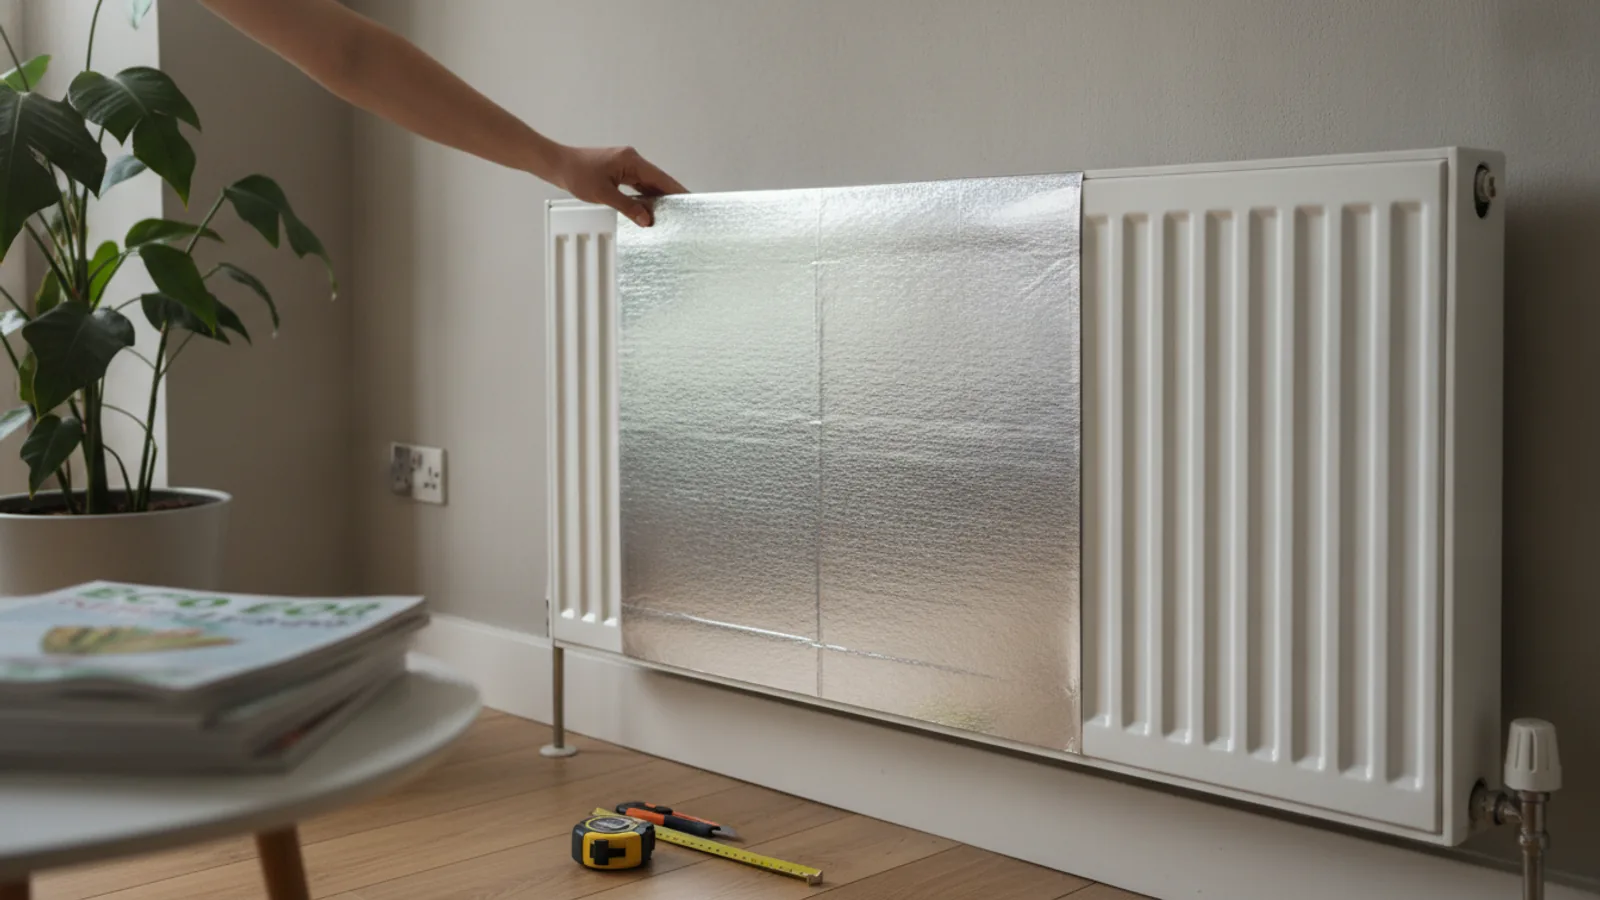
How To Use Radiator Reflectors
Radiator reflectors are a simple, low-cost way to make your central heating more efficient. They are thin sheets of reflective material that you place behind your radiators to bounce heat back into the room, preventing it from being absorbed by the wall. This is especially effective for radiators mounted on external walls, where significant heat can be lost to the cold outside. This guide will walk you through every step of fitting them correctly, helping you reduce energy waste and potentially lower your heating bills. It's a quick DIY job that requires no special skills and delivers long-term savings.
Fast Answer
- Key Action: Fit reflective foil behind your radiator.
- Orientation: The shiny side must face the radiator.
- Purpose: To reflect heat back into the room instead of letting it escape through the wall.
Before You Start
Gathering your tools and preparing the area makes the job much smoother. You won't need anything specialised, and most items will already be in a standard DIY toolkit.
- Radiator reflector foil (available in rolls or pre-cut sheets)
- Measuring tape
- Sharp scissors or a utility knife
- Strong double-sided adhesive tape (heat-resistant is best) or wallpaper paste
- A long, thin object like a wooden ruler, metre stick, or bamboo cane
- Cleaning cloth, warm water, and a mild detergent
- Pencil or marker for marking the foil
- A vacuum cleaner with a narrow nozzle or a long-handled brush (optional, for cleaning)
Step-by-Step Instructions
Follow these steps carefully for a neat, effective installation. The key to success is in the preparation: a clean wall and accurate measurements will ensure the reflector works perfectly and remains hidden from view.
Turn Off and Clean the Area
Before you do anything else, you must ensure the radiator is off and cold. Turn the thermostatic radiator valve (TRV) to the 'off' or frost setting (usually marked with a '0' or a snowflake symbol). Wait at least an hour for it to cool down completely.
Once it's safe to work, focus on cleaning the wall behind the radiator. This area is a magnet for dust, cobwebs, and grime, which will prevent the adhesive from forming a strong bond. Use a vacuum cleaner with a crevice tool or a long, thin brush to remove all the loose debris. Afterwards, mix a small amount of mild detergent with warm water and use a cloth to wipe down the wall surface. A cloth wrapped around a ruler can help you reach tight spots. Allow the wall to dry completely before proceeding.
Measure the Radiator and Wall Space
Accurate measurements are vital for a tidy finish. The goal is to have the reflector panel be slightly smaller than the radiator itself, so it’s completely hidden once installed.
First, use your measuring tape to find the height and width of the radiator. Note these dimensions down. Now, subtract approximately 2-3 cm (about 1 inch) from both the height and width. This will be the final size of your reflector panel. For example, if your radiator measures 60cm high by 120cm wide, you should cut your foil to about 58cm by 118cm.
Next, you need to account for the wall mounting brackets. Measure the distance from the top of the radiator down to the top of each bracket, and also measure their position horizontally. These measurements will allow you to cut precise notches in the foil so it can slide past the brackets and sit flat against the wall.
Cut the Reflector Foil to Size
Lay your roll of radiator foil on a flat surface. Using the dimensions you just took, mark out the cutting lines on the foil with a pencil or marker. Use a straight edge, like a long ruler, to ensure your lines are perfectly straight.
With sharp scissors or a utility knife, carefully cut along the lines. Be cautious as the foil edges can be sharp. Once the main panel is cut, use your bracket measurements to mark and cut small slits or square notches into the top edge of the panel. These will allow the foil to fit neatly around the radiator’s supports. It's better to cut these notches slightly larger than you think you need, to make positioning easier.
Apply Adhesive to the Foil
The easiest and cleanest method for securing the foil is using double-sided tape. Choose a strong, good-quality tape; a heat-resistant variety is ideal given the location.
Turn the foil panel over so the non-shiny side is facing up. Apply strips of the double-sided tape along all four edges of the panel. For larger panels, add a few extra strips in an 'X' or grid pattern across the middle to prevent it from sagging over time. Do not peel the backing paper off the tape just yet.
An alternative is using wallpaper paste. If you choose this method, you would apply the paste directly to the wall rather than the foil. However, this is a messier process and makes removing the foil later much more difficult. For most DIY installations, double-sided tape is the recommended choice.
Position and Secure the Reflector
This is the most critical step. First, peel the backing paper off all the strips of double-sided tape on your foil panel. Now, carefully begin to lower the panel into the gap between the radiator and the wall. It is essential that the shiny, reflective side faces forwards, towards the back of the radiator. This is what allows it to reflect heat back into your room.
Use your long ruler or stick to help guide the panel down, aligning the notches you cut with the wall brackets. Once it's in the correct position, use the ruler to press the foil firmly against the wall. Work from the centre outwards, smoothing the panel down to ensure all the adhesive strips make good contact with the wall surface. Pay special attention to the edges and corners.
Take a step back and check your work. The foil should be completely hidden behind the radiator, with no edges showing from the top, bottom, or sides.
Turn the Radiator Back On
With the reflector securely in place, your work is done. You can now turn the TRV on the radiator back to your desired temperature setting. The heating system will function as normal, but now, a significant portion of the heat that was previously being lost into the wall will be redirected into your living space, helping the room warm up faster and stay warm for longer.
The effect is cumulative and works quietly in the background. While you won't feel a sudden blast of extra heat, the increased efficiency will contribute to energy savings throughout the colder months.
Quick Reference
| Situation | Use this | Why |
|---|---|---|
| Radiator is on an external wall | Prioritise fitting a reflector here | This is where the most heat is lost to the outside, giving you the biggest efficiency gain. |
| Radiator is on an internal wall | Lower priority or skip | Heat lost to an internal wall just helps warm the next room, so energy savings are minimal. |
| Radiator is very close to the wall | A flexible ruler or thin piece of card | Helps to guide the foil into place and press it firmly against the wall in tight spaces. |
| Foil won't stick properly | More tape or stronger wallpaper paste | Ensures a secure, long-lasting bond against a clean, dry wall, preventing the foil from sagging. |
Common Problems When You Use Radiator Reflectors
Even a simple DIY job can have its hitches. Here are some common issues you might encounter and how to solve them.
The foil keeps peeling or falling off the wall.
This is the most frequent problem and is almost always caused by poor adhesion. The main culprits are either a dirty wall surface or insufficient adhesive. If your reflector comes loose, you'll need to remove it. Thoroughly re-clean the wall with a sugar soap solution or mild detergent to remove any residual grease or dust, then let it dry completely. When you reapply the foil, use more double-sided tape than before, ensuring every edge is secured, and add extra strips in the middle. Alternatively, switch to a stronger adhesive like a specialist foil adhesive or high-tack wallpaper paste.
The foil is visible and looks untidy.
If you can see the edges of the foil sticking out from behind the radiator, it means it was cut too large. While it will still work, it can look messy. The only proper fix is to carefully remove the panel, re-measure your radiator, and trim the foil down so that its dimensions are about 2-3 cm smaller than the radiator on all sides. A neatly installed reflector should be completely invisible from any angle in the room.
I can't reach behind my radiator to clean or fit the foil.
Some older radiators are fitted very close to the wall, leaving a minimal gap. This makes cleaning and installation challenging. For cleaning, use a vacuum cleaner with its longest crevice tool. You can also try a 'radiator brush', a long, flexible brush designed specifically for this purpose. For fitting the foil, attach it to a thin piece of cardboard (cut to the same size) to give it rigidity. This 'carrier board' can then be slid into place more easily. Use a long, thin stick to press it against the wall. In very rare cases with extremely tight gaps, the only solution may be to have a plumber temporarily loosen the radiator from its mountings, but this is usually not necessary.
Advanced Tips for Using Radiator Reflectors
Once you've mastered the basics, here are a few ways to maximise the benefits and integrate reflectors into a wider home energy efficiency strategy.
Prioritise Walls with the Highest Heat Loss
Not all walls are equal. The biggest energy savings will come from fitting reflectors behind radiators on uninsulated solid external walls. These lose heat far more rapidly than modern cavity walls. The next priority should be insulated cavity external walls. Radiators on internal partition walls (those between two heated rooms) offer very little benefit, as any heat passing through the wall simply helps to warm the adjacent room. Focus your time and money where it will make the most difference.
Combine with a Radiator Shelf
For an extra efficiency boost, consider installing a radiator shelf above your radiator. Heat rises, and a shelf helps to deflect the warm convection current away from the wall and out into the centre of the room. This prevents the heat from rising directly to the ceiling and can also stop dust and moisture from marking the wall above the radiator. The combination of a reflector (tackling radiant heat loss) and a shelf (managing convected heat) creates a more effective heating system.
Choose an Insulated Reflector Product
While standard foil-only reflectors work well, you can also buy products that bond the reflective layer to a thin sheet of polyethylene foam or similar insulation. This type of reflector offers a dual benefit: it reflects radiant heat from the radiator while also providing an extra thermal barrier that reduces heat loss through conduction. This small upgrade is particularly worthwhile for radiators on very cold, damp-prone external walls.
How To Use Radiator Reflectors FAQ
Which way should the radiator foil face?
This is the most important rule: the shiny, reflective side must always face the radiator. The entire purpose of the device is to reflect infrared heat radiation, which emanates from the back of the radiator. If you install it with the shiny side facing the wall, it will be far less effective.
Do radiator reflectors actually work and save money?
Yes, they do. Independent tests by organisations like the Energy Saving Trust and various universities have shown that they are an effective energy-saving measure. They can reduce the heat lost through a wall behind a radiator by a significant amount. While the saving on any individual bill may be modest, it adds up over the course of a winter and the lifetime of the product. Given their very low cost, they offer an excellent return on investment.
Can I just use kitchen tin foil instead?
While you can, it's generally not a good idea. Kitchen foil is extremely thin and fragile, making it very difficult to install without tearing. It's also not designed to withstand repeated heating and cooling cycles. Purpose-made radiator foil is thicker, more durable, easier to handle, and often treated with a coating to prevent oxidation. It is a far superior and longer-lasting solution.
Will radiator reflectors cause damp or mould issues?
No, quite the opposite. By reducing the amount of heat escaping into the wall, the reflector helps to keep the wall surface slightly warmer than it would otherwise be. A warmer surface is less prone to condensation, which is a primary cause of damp and mould growth. As long as you install the reflector on a clean, dry wall, it should not cause any problems and may even help prevent them.
Final Checklist for Using Radiator Reflectors
Before you relax, run through this quick final checklist to ensure your installation is perfect.
- The radiator was turned off and completely cool before starting.
- The wall surface behind the radiator was thoroughly cleaned and allowed to dry.
- The reflector foil was measured and cut to be slightly smaller than the radiator's visible area.
- Notches for the wall mounting brackets were correctly cut into the foil for a flat fit.
- Adhesive was applied securely to the back (dull side) of the foil panel.
- The foil was installed with the shiny, reflective side facing towards the radiator.
- The panel was pressed firmly against the wall and is not visible from the front or sides.
- The radiator has been turned back on to its normal setting.


